Saturday, May 12, 2012

Testing iOS 4 Apps on the iPhone – Developer Certificates and Provisioning Profiles (Xcode 4)

Joining the iOS Developer Program

Being a member of the iOS Developer Program should not be confused with being a registered Apple developer. Being a registered Apple developer only gives you the ability to download the iOS SDK and access to additional developer related information. Membership of the iOS Developer Program, however, allows you to set up certificates and provisioning profiles to test apps on physical devices and, ultimately, submit completed apps for possible acceptance into the Apple App Store.
Enrollment into this program currently costs $99 per year. It is also possible that your employer already has membership, in which case contact the program administrator in your company and ask them to send you an invitation to join. Once they have done this Apple will send you an email entitled "You Have Been Invited to Join an Apple Developer Program" containing a link to activate your membership. If you or your company is not already a program member, you can enroll online at:
Having completed the enrollment process, navigate to http://developer.apple.com and click on the Member Center link located near the top right hand corner of the screen. On the resulting page enter the Apple ID and password associated with your iOS Developer Program membership to access the member center home page as illustrated in the following figure:

Deploying Your App to Your Own iPhone / iPad / iPod

When I first learned how to write an iOS application, I found that the biggest challenge wasn't in learning Objective-C, nor was it in becoming familiar with the Xcode IDE.  Instead, the main difficulty was in getting my app on to my own device!  Unfortunately, many of the books and tutorials assume you'll figure this out on your own... and as I learned, the process was not trivial:
  • I had to create a public/private key pair (via "Keychain"),
  • Generate a certificate request (via "Keychain"),
  • Login to the Provisional Portal at the Apple Developer Site,
  • Create and download a development certificate with the certificate request,
  • Find & register the UDID of my device,
  • Create an "App ID",
  • Create and download a provisional profile which links my developer certificate, UDID, and App ID together,
  • Install the certificate & profile into Xcode...

Saturday, May 5, 2012

Learn Objective-C: Day 4


Welcome to part four of this series on Objective-C. So far, we’ve looked a lot at theory and the principles and functionality of the language to get a good idea of how it works. Today, we will be making a simple class similar to the car example we looked at in previous parts of this series. Our class will take the details of a car, allowing us to get and set the values held. After today’s example you should be able to create your own classes in Xcode and toy around with them.
So far, we have had some great feedback via email, twitter and comments. Itʼs great to see so many people are interested in this subject and itʼs even better to see that so many of you are trying it out for yourself and asking some great questions. Keep it up!

Getting Started

Start by firing up Xcode and creating a new project. Under the Mac OS X separator, click Application, then click Command Line Tool. Finally, change the drop down box to set the type to Foundation.
Xcode New Project

Friday, May 4, 2012

Installing Tomcat on Mac OS X

To get Tomcat, visit the following link: http://tomcat.apache.org/. Once there, click on the Tomcat 5.5 link under the Download heading. Under Core, select the tar.gz file.
Download the tar.gz file. Mac OS X will probably extract the file to a .tar file in your downloads directory. Move this .tar file to a location on your computer where you would like tomcat. For purposes of this guide, the location will be /Users/user. Double-click the tar to extract it. This should create a directory in /Users/user named something like apache-tomcat . . . Rename this to something simple like tomcat. At this point, you should have the following directory on your machine: 

/Users/user/tomcat 

There is a file called startup.sh located in the the /Users/user/tomcat/bin directory that needs edited. Open EditRocket and open startup.sh Add the following two lines after the line in startup.sh that starts with EXECUATBLE. Note that for Snow Leopard, you can use 1.6 instead of 1.5 after the Versions text in the first line listed below. 

export JAVA_HOME=/System/Library/Frameworks/JavaVM.framework/Versions/1.5/Home
export CATALINA_HOME=/Users/user/tomcat
To start Tomcat, open up a Terminal window (Applications -> Utilities -> Terminal). cd to the tomcat bin directory by typing the following: 

cd /Users/user/tomcat/bin 

Type the following: 

sh startup.sh 

This will start Tomcat. To shutdown tomcat, type sh shutdown.sh
To test the tomcat installation, enter the following in your web browser: 

http://localhost:8080/ 

If the apache tomcat page shows up, the installation was successful.
There is a sample web application called jsp-examples located in the webapps directory under the tomcat installation directory. This location can be used to test your own JSP pages, or you can use the files contained in this directory as a template for creating your own web application. 

The jsp-examples can be accessed in your web browser using the following URL: http://localhost:8080/jsp-examples/

Thursday, May 3, 2012

"EGO" Xcode Theme for Xcode 4 + EGOv2

Almost two years ago now, we posted our Xcode theme, "EGO".  It's been significantly more popular than I ever thought, we've seen a lot tweets about, we've seen it in screen casts, and it even made an appearance in the product launch video for robotcat's Outside app.  There's no real metric for these things, but it seems to be one of the more popular third party Xcode things (we're number one in Google!).

Wednesday, May 2, 2012

Learn Objective-C: Day 3


Welcome to part three of this series -I hope youʼre enjoying it! Last week we looked at how we separate classes in to separate files (interface and implementation), this week weʼre going to look at classes again, but a little bit more in depth. Weʼll also take a peak at inheritance and how it works, along with variable scope.
So far, we have had some great feedback via email, twitter and comments. Itʼs great to see so many people are interested in this subject and itʼs even better to see that so many of you are trying it out for yourself and asking some great questions. Keep it up!

Tuesday, May 1, 2012

Learn Objective-C: Day 2


Welcome to part two of this introductory series on Objective-C. After spending last week reviewing the fundamentals of the C language upon which Objective-C is built, this week we will transition to focusing on what makes Objective-C such a great language for software development. Specifically, we will discuss the fundamentals of Object Oriented Programming (OOP) and demonstrate how to create a class and send messages to objects in Objective-C.

Object Orientated Programming

Why do we have Objective-C? Why not just use the underlying C language? The reason we have Objective-C is to give us an object oriented playground within which to build our applications. OOP is a programming paradigm that attempts to allow developers to think about software design in terms of objects and attributes instead of variables and functions. Specifically, OOP attempts to obtain data abstraction, encapsulation, modularity, polymorphism, and inheritance. The topic of OOP could easily fill a book (or a tutorial series) on its own, so instead I’ll introduce you to the basic principles by way of example.

Monday, April 30, 2012

Learn Objective-C: Day 1


Welcome to my series on coming to grips with the awesome language that is Objective-C. Throughout this small series of articles, my aim is to take you from no prior experience with Objective-C to using it confidently in your own applications. This isnʼt a rush job – so donʼt expect to just skim through the basics and be away – weʼll be going through not just the bare essentials, but also the best practices you can apply to ensure your code is the best it can be. Letʼs jump straight in!

What is Objective-C?

If youʼre reading this series then Iʼll hazard a guess that you already know, but for those of you who donʼt, donʼt worry as by the end of this part youʼll know what it is back-to-front and inside-out.
Objective-C is an object oriented language which lies on top of the C language (but I bet you guessed that part!). Itʼs primary use in modern computing is on Mac OS X as a desktop language and also on iPhone OS (or as it is now called: iOS). It was originally the main language for NeXTSTEP OS, also known as the operating system Apple bought and descended Mac OS X from, which explains why its primary home today lies on Appleʼs operating systems.
Because Objective-C is a strict superset of C, we are free to use C in an Objective-C file and it will compile fine. Because any compiler of Objective-C will also compile any straight C code passed into it, we have all the power of C along with the power of objects provided by Objective-C.
If youʼre a little confused at this point, think of it this way: everything C can do, Objective-C can do too, but not the other way around.

Saturday, April 28, 2012

Creating A Cydia Repository/Source For iOS! [Covering Everything A-Z]


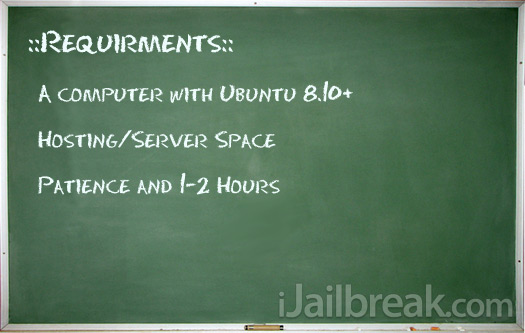
This tutorial will explain the process of creating a Cydia repository from start to finish. We will cover everything from the initial preparation all the way to the hosting and publishing of your Cydia repository. This tutorial will get moderately technical and is not recommended for users who are new to computers or new to the whole jailbreaking scene. I will provide support for this tutorial through the comments section, but you can also contact me directly at: jaden@ijailbreak.com
ijailbreak_chalkboard

Wednesday, April 25, 2012

Cocoa: Binding. GUI application without outlets


Outlet in Cocoa is a persistent reference to a GUI control. For example, it is a common way to create the outlet to the text field and change the text in this field via the outlet. Now, in 64-bit Xcode, you add a property with IBOutlet keyword, synthesize it, and set new text via that property:

1. In interface declaration:
@property (retainIBOutlet NSTextField * text;

2. In the implementation section:
@synthesize text;

3. Set new text to the text field:

text.stringValue = @"Hello, World!";

4. Get value:

NSString* str = text.stringValue;

Cocoa: show Alert

Show Alert in a Cocoa application:


- (IBAction)showAlert:(id)sender
{
NSString *question = NSLocalizedString(@"Do you see this alert?"
   @"Let's verify that I see this question");
NSString *info = NSLocalizedString(@"I hope, I see this alert"
           @"Here is an info");
NSString *cancelButton = NSLocalizedString(@"Cancel"
   @"Cancel button title");
NSAlert *alert = [[NSAlert allocinit];
[alert setMessageText:question];
[alert setInformativeText:info];
[alert addButtonWithTitle:cancelButton];
NSInteger answer = [alert runModal];
[alert release];
alert = nil;
}

Cocoa: NSScanner

sscanf is a standard C function. We use it so rarely, but it exists and can be the fastest method to parse a string. In order to remind I post this short program that uses sscanf to retrieve two float number from a string:

#include <stdio.h>

int main (int argc, const char * argv[]) 
{
    float x, y;
    const char* string = "3.1415 6.28";
    sscanf(string, "%f %f", &x, &y);
    printf("x = %.4f, y = %.2f\n", x, y);
    return 0;
}

Template program to learn Cocoa graphics

The standard way to learn new programming language is very boring for me - endless reading of heavy books, typing useless programs that calculates factorials,... Since my student times, since GWBASIC I begin from the graphics, simple graphic, rectangles, circles - the graphic primitives. When I know how to draw them, I can go on and learn the basic language constructions, language semantic and programming techniques.
This way works for me in my Cocoa period. In this post I'd like to show two methods to create a template project that allows to learn the Cocoa graphical primitives. This template can grow in your hands and become a real Cocoa (or Coco Touch) application.
As any Cocoa application this application has a main window and a view inside. That's all. First method uses Interface Builder. The second one fully ignores the Interface Builder.

Cocoa: Implicit Animation


This program will help to begin with the Core Animation.
1. In Xcode create Max OS X Cocoa Application.
2. In the Application delegate implementation file (automatically created by Xcode on Snow Leopard) add a button to the content view:
- (void)applicationDidFinishLaunching:(NSNotification *)aNotification 
{
    // Create new button in content view.
    NSRect frame = NSMakeRect(10, 40, 90, 40);
    NSButton* pushButton = [[NSButton alloc] initWithFrame: frame];
    pushButton.bezelStyle = NSRoundedBezelStyle;
    [pushButton setTitle: @"Move"];
    [self.window.contentView addSubview: pushButton];
    
    // Set the button target and action.
    pushButton.target = self;
    pushButton.action = @selector(move:);
    
    [pushButton release];
}

Save and Load UIImage in Documents directory on iPhone


The following function saves UIImage in test.png file in the user Document folder:
- (void)saveImage: (UIImage*)image
{
    if (image != nil)
    {
        NSArray *paths = NSSearchPathForDirectoriesInDomains(NSDocumentDirectory, 
                      NSUserDomainMask, YES);
        NSString *documentsDirectory = [paths objectAtIndex:0];
        NSString* path = [documentsDirectory stringByAppendingPathComponent: 
                       [NSString stringWithString: @"test.png"] ];
        NSData* data = UIImagePNGRepresentation(image);
        [data writeToFile:path atomically:YES];
    }
}

Create Bitmap Graphics Context on iPhone


The following function creates an UIImage object:
- (UIImage*)makeImage: (CGRect)rect
{
    CGFloat width = CGRectGetWidth(rect);
    CGFloat height = CGRectGetHeight(rect);
    CGColorSpaceRef colorSpace = CGColorSpaceCreateDeviceRGB();
    
    size_t bitsPerComponent = 8;
    size_t bytesPerPixel    = 4;
    size_t bytesPerRow      = (width * bitsPerComponent * bytesPerPixel + 7) / 8;
    size_t dataSize         = bytesPerRow * height;
    
    unsigned char *data = malloc(dataSize);
    memset(data, 0, dataSize);

    CGContextRef context = CGBitmapContextCreate(data, width, height, 
                bitsPerComponent, 
                bytesPerRow, colorSpace, 
                kCGImageAlphaPremultipliedLast | kCGBitmapByteOrder32Big);

    
    CGColorSpaceRelease(colorSpace);
    CGImageRef imageRef = CGBitmapContextCreateImage(context);
    UIImage *result = [[UIImage imageWithCGImage:imageRef] retain];
    CGImageRelease(imageRef);
    CGContextRelease(context);
    free(data);    
    return result;
}

Make a snapshot from an iPhone application


Today I needed to make a snapshot programmatically. I thought it's easy:
[iPhone developer:tips];. Screen Capture using UIGetScreenImage.
Unfortunately, this approach does not work for me. People say that this API is private.
Ok. Let's make our own function.
I will add this function to my application delegate class. It looks so:
@interface myDelegate : NSObject<UIApplicationDelegate>
{
    UIWindow* window;
}

- (void) makeSnapshot;

@end

Cocoa. Date and Time

This small program below detects the current date:

#import <Foundation/Foundation.h>

int main (int argc, const char * argv[]) {
    NSAutoreleasePool * pool = [[NSAutoreleasePool alloc] init];

     NSDate* today = [[NSDate alloc] init];
     NSLog(@"today is: %@", today);
    
    [today release];        
    [pool drain];
    return 0;
}
In the console you'll see:

run
[Switching to process 12401 local thread 0x3f03]
Running…
2010-03-06 17:05:45.217 DayOfToday[12401:a0f] today is: 2010-03-06 17:05:45 +0200

The Blocks

Apple introduced blocks (a segment of code that can be executed any time) in C and Objective-c. It happened in Mac OS X 10.6. Later on this feature was back-ported to Mac OS X 10.5 and iPhone by Plausible Labs.  The blocks are also called closures, because they close around variables. Also the blocks can be called lambdas.
I'd say that the blocks are the same as the regular function pointers in C. From a very general point of view, the main difference is just the symbol caret (^) before the block name instead of the asterisk (*) before the function pointer. Here is a trivial example: 

#import <Foundation/Foundation.h>

int main (int argc, const char * argv[])
{

    @autoreleasepool {

        void (^now)(void) = ^{ 
            NSDate* moment = [NSDate date];
            NSLog(@"Now: %@", moment);
        };
        
        
        now();
    }
    return 0;
}
The program output is: [Switching to process 41322 thread 0x0] 2011-11-26 18:07:25.202 block4[41322:707] Now: 2011-11-26 16:07:25 +0000 Program ended with exit code: 0 The following program simply creates and synchronously performs a block:

Sort String Array

The following code demonstrates how to sort an array of strings in Objective-C:
#import <Foundation/Foundation.h>

int main (int argc, const char * argv[])
{

    @autoreleasepool {
        
        NSArray *stringsArray = [NSArray arrayWithObjects:
                                 @"string 1",
                                 @"String 21",
                                 @"string 12",
                                 @"String 11",
                                 @"String 02", nil];
        static NSStringCompareOptions comparisonOptions = NSCaseInsensitiveSearch | NSNumericSearch |
        NSWidthInsensitiveSearch | NSForcedOrderingSearch;
        NSLocale *currentLocale = [NSLocale currentLocale];
        NSComparator finderSort = ^(id string1, id string2) {
            NSRange string1Range = NSMakeRange(0, [string1 length]);
            return [string1 compare:string2 options:comparisonOptions range:string1Range locale:currentLocale];
        };
        
        NSArray* sortedArray = [stringsArray sortedArrayUsingComparator:finderSort];
        NSLog(@"finderSort: %@", sortedArray);        
    }
    return 0;
}
This code is taken from iOS Developer Library.

Accelerometer. It's simple

The simplest way to use accelerometer in an iPhone application is UIAccelerometer class:

    UIAccelerometer* accelerometer = [UIAccelerometer sharedAccelerometer];
This code above shows how to get the accelerometer instance in the code.
The following line sets up the update interval:

    [accelerometer setUpdateInterval1.0 / 10.0f];
    [accelerometer setDelegate:self];
each 0.1 second the accelerometer will update the program that implements delegate method:

 - (void)accelerometer:(UIAccelerometer *)acel didAccelerate:(UIAcceleration *)aceler 
{
    NSLog(@"acceleration.x = %+.6f", aceler.x);
    NSLog(@"acceleration.y = %+.6f", aceler.y);
    NSLog(@"acceleration.z = %+.6f", aceler.z);
}
Do not forget to add UIAccelerometerDelegate, for example, to a view controller class:

Objective-C. Class Extensions.

Few years ago, I was writing my first program in Objective-C, I was surprised that there is no way to add a private method to my class. Encapsulation, one of the basic principles of the OO programming, does not work in Objective-C? Unbelievable.
I found a way to declare a private category in the class main implementation class:

@interface MyClass (Private)
- (void)privateMethod;
@end

Once, by mistake, probably because of this annoying spell checker helping to type code in Xcode, I forgot the category name:


@interface MyClass ()
- (void)privateMethod;
@end

Singleton in iOS Programming

What Apple says about Singleton: 
Cocoa Core Competencies.Singleton 
Creating a Singleton Instance 

What other people say: 
Singletons in Cocoa/Objective-C 
Implementing a Singleton in iOS 
Implementing a Singleton in Objective-C / iOS 
Singleton Classes 
A note on Objective-C singletons 
Singletons, AppDelegates and top-level data. 

A long discussion about it in Stackoverflow: What does your Objective-C singleton look like?